3D Stereo is a hot topic nowadays but few people know any practical applications aside from the entertainment value. Few people also know how 3D Stereo works and how easy it is to use with any Photoshop project. To learn more about the powers of 3D Stereo and how to use Stereoscopic 3D to your Photoshop advantage, we invite you to view some quick illustrations.
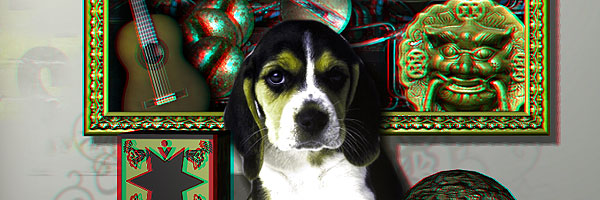
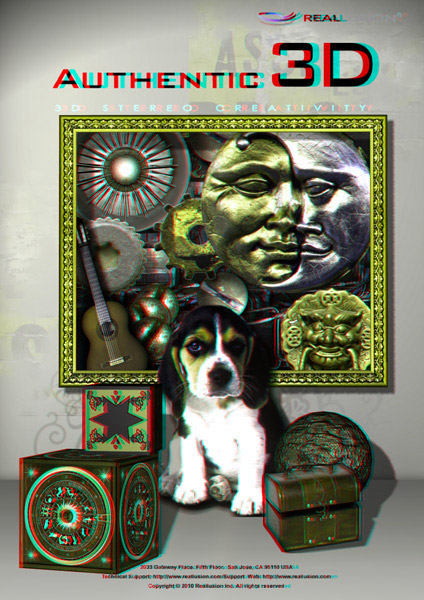
Take note that the below 3D Stereo image employs a traditional Anaglyph (Red/Cyan) format, but we are also able to create 3D Stereo printouts in any other format if needed.
Photoshop is known to help designers create high-quality printouts inside a layer-based editing environment that turns ideas into stunning images, but how can we turn Photoshop projects into real 3D Stereo printouts?
In this tutorial, we will use and combine the magic of Photoshop with the powerful 3D production tools of iClone. We will create a final image with exceptional high quality but done in a lot less time, since we intend to use real 3D objects in real 3D space.
At the end of this tutorial, you will be able to transform your Photoshop projects into eye-catching 3D stereo printouts done with the one-click 3D Stereo feature inside iClone. Download iClone trial version here.
Prepare Image Assets in Photoshop.
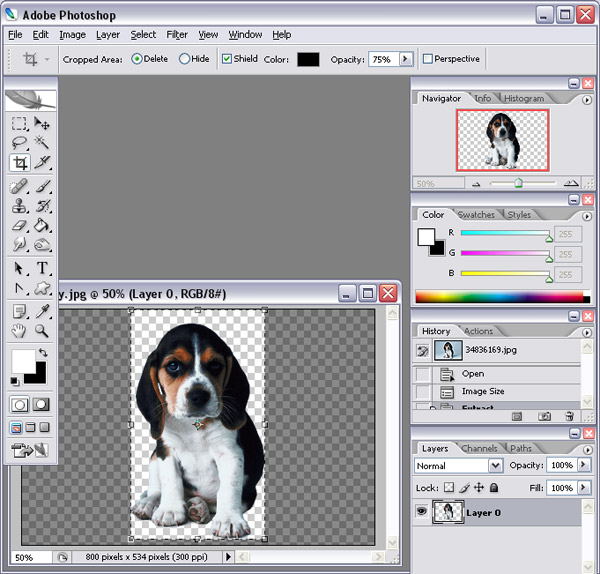
To begin, we will first open Photoshop in order to import our image assets. We will then prepare these images with their own alpha channels (mask) to later save them and use inside iClone. For tutorial purposes we will only prepare one image, but you may use the same procedure to prepare as many images as needed.
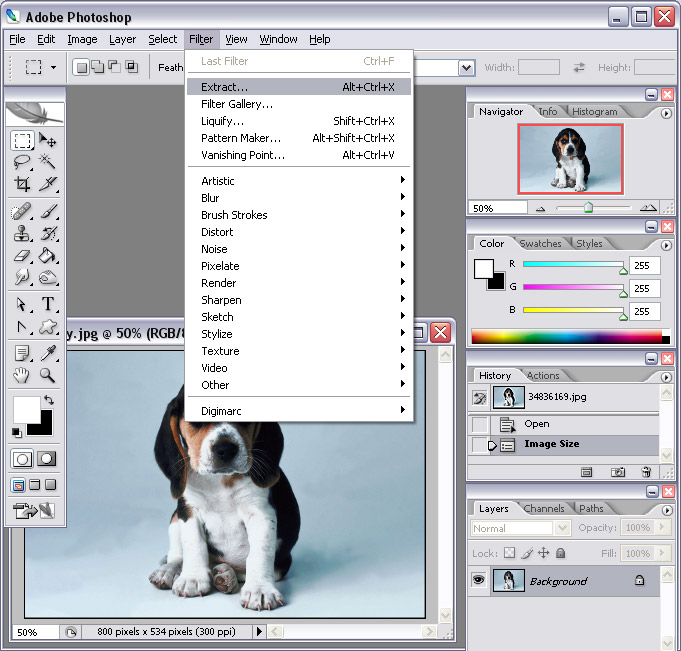
To start off, we import the first picture in order to separate the wanted area (mask) from the rest.
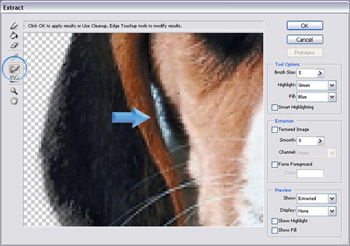
We then go to the Filter Tab and select ‘Extract’. (Filter>Extract)
Inside, we adjust the ‘Brush Size’ and paint on the edge of the target object. Remember that the smaller the size of the brush, the more edge details you will cover.
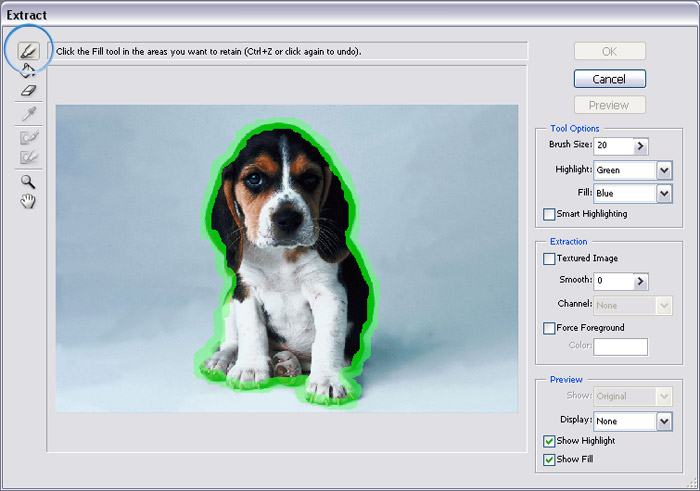
Now we click on the ‘Fill Tool’ to fill up the wanted area.
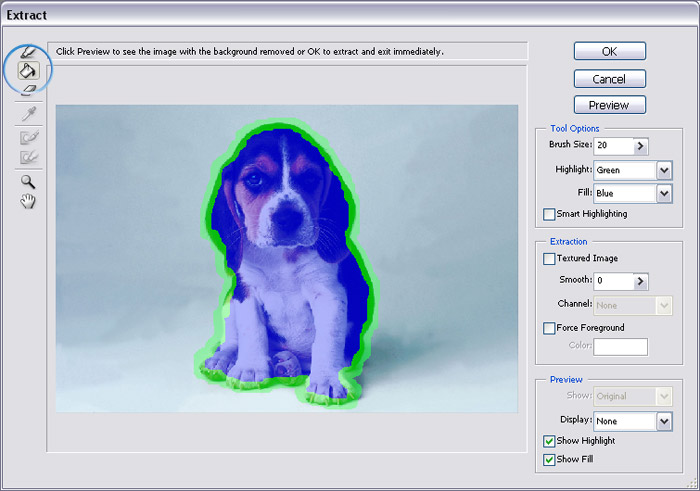
If needed, you may press the ‘Preview’ button to review.
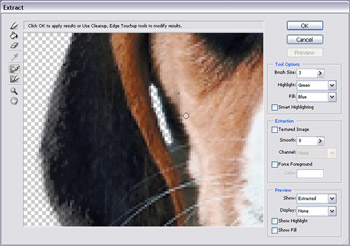
After previewing, we use the ‘Clean Up’ tool to remove any excess area inside or around the edge mask.
The unnecessary area.
Paint to remove the area.
Now we use the ‘Edge Touch Up’ tool to retrieve the lost area near the edge.
Remember to draw from the inside out.
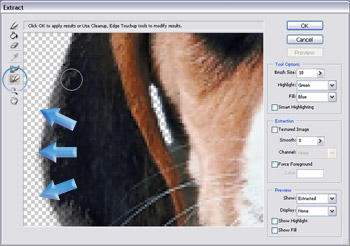
Fine-tune image with sharp edges.

Later, we click ‘OK’ to crop out the target object. This step is very important since it is here where we create the image’s alpha channel (mask).
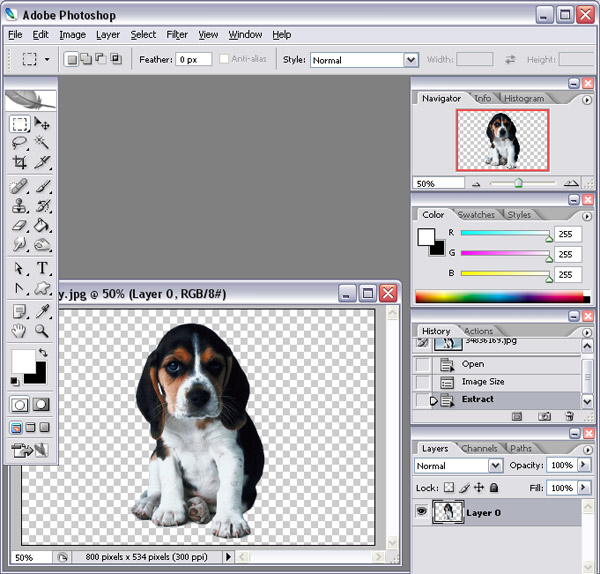
Then we use the ‘Crop Tool’ to crop out the canvas.
We crop out the canvas in order to make the file size smaller, since we do not need the other area.
We crop out the canvas in order to make the file size smaller, since we do not need the other area.
Now, we are ready to use this new image asset inside a real 3D environment. We save the image into PNG format and continue preparing the other images. We will repeat this step until we prepare and save all the images we intend to work with.
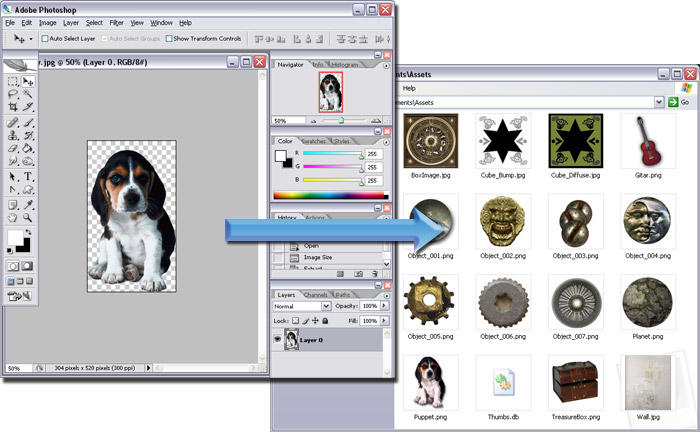
Note: Remember to keep all your image files in one single folder as this will be the asset library to work with.
Drag and Drop Image Assets in iClone.
We continuing saving all the original elements of our Photoshop project by turning them into individual PNG files for further editing in iClone.

Now we will open iClone since it is here where we will align all our images in real 3D Space. iClone is an easy-to-use 3D animation tool that allows us to quickly drag images, and props, with fast drag & drop mechanics.
To start, we first drag all our Photoshopped images (PNG files) into iClone with the right mouse button. Inside you will then be prompted with a menu, asking what kind of object you want the asset to be converted to.
Select the ‘Plane’ option.

The files will then turn into image planes inside the iClone working area. The alpha channel of each PNG image file will automatically mask the outline of the image.

Repeat the above step until all your items are loaded into iClone’s 3D environment.

Inside iClone you may easily use, and animate ready-made 3D objects (props) and characters (avatars) instead of going through several complicated steps in Photoshop. Remember, that our goal here is to create high-quality 3D images in half the time. We may either drag images from any previous Photoshop projects or use any of the free props inside the iClone content library.

Map each Layer into its own Z-depth.
Once all our assets (image planes and props) are loaded into iClone, then we proceed to adjust the position of each. For this, you may use the move tool to correctly relocate each object into the layer position you have in mind.
Select the ‘Move’ tool. (Press ‘W’ Key)

Move the image planes and the 3D props around, and order them into the layers you need. If you do this inside Photoshop the distance between each layer is actually 0 (zero), but inside iClone you actually have a Z-depth allocated to each object. This provides the great benefit of increasing and directly controlling the 3D sensation inside a 3D Stereo scene.

Rotate the camera view with the Pan Tool (Press ‘X’ Key) in order to check the Z-depth of all the objects in the scene. This method will allow you to have full control over all positioning and depth.

Now you need to turn on the Movement Gizmo in order to bring up the X, Y and Z axis controls for the selected item. To activate the movement gizmo, just press CTRL + Q. (Make sure you first select the item and also have the Pan tool activated) Then drag the green arrow (Z-Axis) of the gizmo to change the Z-depth of each selected item. (Note: Red arrow is X-axis and Blue arrow is Y-axis)

Transform Objects inside iClone.
Sometimes objects in iClone may need to be further adjusted for size and orientation.
To do this first select the object that is in need of resizing and switch to the ‘Scale’ tool (Press ‘R’ Key). Then, drag inside the working area so that the object is scaled to the desired size.
Original size.

Repeat this step until all objects are re-scaled.

Now we will do the same with the rotate tool (Press ‘E’ Key) by activating the tool and rotating the necessary objects. Remember to select the object first.

We will select the object, activate the rotate tool and drag in the working area to rotate.

You will notice how easily and quickly you can rotate objects in iClone as its native 3D environment provides a lot more control than Photoshop.

Apply Materials to 3D Objects.
Usually simple props do not have the correct material or texture that we need. Here, we will learn how to apply different materials onto different objects.
Drag and drop a prepared image with the right mouse button. You may drag it from your Windows Explorer folder and drop it directly onto your 3D target’s surface.

Then choose the last option at the bottom of the pop-up menu and pick the ‘Diffuse Map’ in the sub menu.

The image will then be mapped onto the diffuse channel of the selected 3D object.

You may use the same method to apply images to different mapping channels in order to create different effects. The section below shows the result when an image is applied to the “Bump Map” channel.

Select another 3D object and in the ‘Modify’ panel at the right, click the ‘Load Material’ button.

You may then select any material template, from the free iClone material library, to apply to the selected 3D object. You may also bring in your own materials and just drop them in.

Light, Shadows and Image layers.
Now we will add light and shadow effects to add realism to the Photoshop project. If you want to have text on your final printout, then you may use the image layer feature inside iClone.
Select one light from the ‘Scene Manager’ (bottom left) and change it to ‘Spotlight’ in the ‘Modify’ panel on the right.

Right click in the working area, and select the Motion Menu>Look at item – option. Click on the dog. Now, no matter how you move or rotate the light, the spotlight will always cast on the dog.

Adjust the spotlight to the desired position.

Now, in the ‘Shadow Setting’ section of the ‘Modify’ panel, select the ‘Self-cast Shadow’ from the drop-down list. Then adjust the ‘Opacity’ of the shadow.

This will cast a realistic light and shadow effect on the entire scene.

Drag (with right mouse button) an image file containing text and alpha channel information from a Windows Explorer folder, and drop it straight into the iClone working area. Then select the ‘Image Layer’ item in the pop-up menu so that the text turns into an image layer.

Export as a Regular Printout.
You may now turn the whole scene into an image file for printing as a flyer, brochure or full-screen billboard since you can control the resolution and output size. You may also go back to quickly modify or tweak the entire project if needed.
Go to the Export tab and choose to export as an ‘Image’. Then, select the format type.

Adjust the Output Export size and choose the Final Render option below. Then click the ‘Export’ button.

Create 3D Stereo Printouts.
The best part about using iClone for graphic design is that you can always export your scenes as a 3D stereo image or video. This works magic on any audience you intend to impress and cannot be quickly done via Photoshop alone.
To export as a 3D Stereo image you first need to check the ‘Enable Stereo Vision Output’ box. Then adjust the ‘Convergence Distance’ value. This value defines the distance between the view camera and the zero parallax plane, also known as the convergence point. The zero parallax plan is where the Z-order equals 0 (zero). Any object in front of the plane will pop out, while any object behind the plane will fall behind the scene. Anything standing close to the zero parallax plane will appear neutral without a 3D Stereo effect.

In this tutorial, the grey photo frame is set to the convergence point. The convergence distance value can be measured by counting the grids between the camera and the photo frame.
Finally, we select the ‘Anaglyph (Red/Cyan)’ option button and export the whole scene as a 3D stereo image. (To view the final image below you will need a pair of Red/Cyan Glasses)
Note: Anaglyph is a traditional and low-cost 3D Stereo format but you can also export in any other high-quality 3D Stereo format you need.

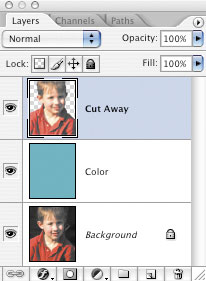
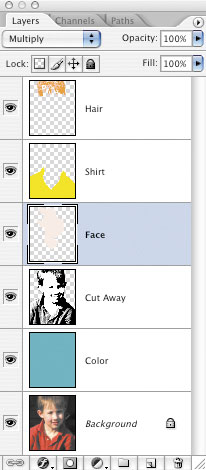
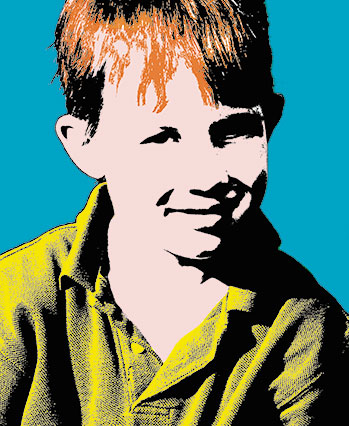
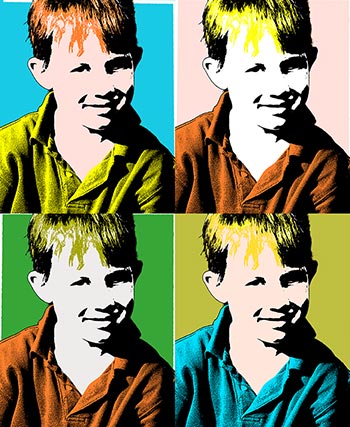 Almost synonymous with Pop Art, Andy Warhol was a painter, photographer, filmmaker, and publisher. In the mid-20th century he produced iconic silkscreen paintings of subjects as mundane as soup cans and as glamorous as Elvis Presley and Marilyn Monroe. These remain hugely popular, and have sparked countless imitations. Creating your own Pop Art-inspired images with Photoshop is easy, and great fun, too.